Watch the ceiling, dodge, then strike
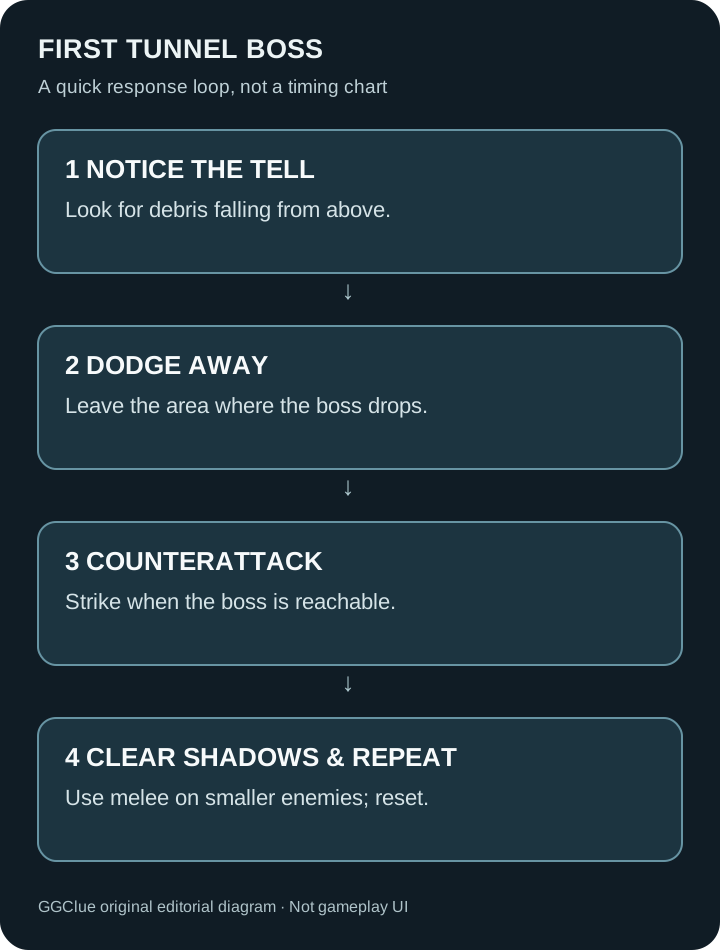
The first boss in Silver Pines appears in the red-lit tunnel east of Crimson Bear Motel, after the Rabbit Hole sequence. The creature retreats toward the ceiling and attacks from above. Falling debris tells you where a drop attack is coming. Dodge away, then hit the boss while it is within reach. Later, deal with the smaller shadow enemies using your melee weapon so you can save ammunition for the main target. These steps are described in two release-period walkthroughs, not based on a new GGClue playthrough.
Before entering the tunnel
- Finish the Rabbit Hole sequence and take the Ferry Office Key before leaving the area; it is needed after the fight.
- Use an available save point, restore health and make sure your equipped weapon is ready. The walkthrough route passes a motel-area save opportunity before this encounter.
- Head east toward the tunnel with the red glow. Enter when you are ready for the ambush.
The published guides discuss both melee and ranged attacks against the main boss. Neither proves that a particular gun, ammunition count or damage build is required.
How to beat the tunnel boss
- Watch for dust and debris falling from above. The boss temporarily leaves your reach and drops into the tunnel. The falling debris is the visible warning described by the walkthroughs.
- Dodge sideways out of the falling area. Do not stand directly beneath the tell waiting for a shot.
- Counterattack when the creature lands and is reachable. Use an available ranged or melee attack, then reset your position for the next ceiling drop. This is a repeatable timing pattern, not a claim about an exact number of hits.
- When shadow enemies appear, prioritize clearing them. Both written routes describe using melee to remove these smaller threats rather than spending your limited ammunition on them.
- Repeat the dodge-and-counter loop until the main creature is defeated. Do not confuse this tunnel fight with the later Sheriff Department boss encounter.
Why the old Demo boss advice can be misleading
In June, players described the Demo fight as difficult to dodge, heal and reload through. A developer replied that the release version had changes to dodge timing and invulnerability frames, the boss hitbox, the shadow enemies’ charge behavior and the healing animation. Those are developer-described changes from the Demo; they are not a promise that any specific dodge timing will work in every difficulty setting.
The developer also explained that inventory does not pause combat. If you need to reload or heal, plan for the encounter to keep moving rather than opening the inventory and expecting the boss to freeze. Developer discussion about release changes · Developer discussion about real-time actions.
After the fight: Memento and ferry
- Inspect the defeated creature. The full-game walkthrough identifies its reward as the Corroded Iron Ball Memento.
- Return to the Ferry Office and use the Ferry Office Key you collected during the earlier Rabbit Hole sequence.
- Inside the office, there is an optional cat interaction and a side area that the walkthrough identifies as containing an inventory-upgrade Hip Bag. These are optional, not prerequisites for winning the fight.
- Use the ferry control panel to call the boat, then board it when it arrives to continue into Downtown.
FAQ
Where is the first boss in Silver Pines?
In the red-lit tunnel east of Crimson Bear Motel after the Rabbit Hole sequence, on the route back toward the ferry.
Should I shoot the shadow enemies?
The two referenced walkthroughs recommend clearing the shadow enemies in melee instead of wasting ammunition on them. Keep your ammunition available for the main boss if you are relying on a firearm.
Is there a fixed number of shots to win?
No reliable universal hit count was established by the checked sources. Weapons, damage and difficulty may affect how long the encounter takes.
Did Hotfix 2 fix this boss?
The October 16 notes describe a progression fix for the Sheriff Department boss, a separate later encounter. They do not state that the first tunnel boss received that particular fix. Official update list.
Sources and scope
- Into Indie Games — first tunnel boss and ferry route, published October 6 on a release-period review route, with original gameplay images available at the source.
- VGTimes — first boss in the tunnel and ferry progression, published October 12.
- Wych Elm — Demo boss changes discussed by the developer.
- Silver Pines official Steam store and official Steam announcements.
Independent fan-written guide; last evidence check October 26, 2026. The written strategy is an evidence-backed synthesis of third-party walkthroughs and developer statements. GGClue has not captured its own full-release gameplay for this page. Screenshots on external source pages belong to their respective rights holders; the flow illustration above is original editorial artwork, not a depiction of the game’s exact interface.
The red tunnel ceiling attack is a full-game fight, not the Demo ending
The independent retail walkthrough describes a red-lit tunnel boss near Crimson Bear Motel, with falling ceiling debris, windows to strike the boss when reachable, and additional shadow enemies best handled conservatively. This is a full-release October 8 encounter. The older party-flashback/final-demo encounter has a different scripted ending; following its tunnel route or expecting the Demo to contain the full ferry story will make the answer less useful, not more precise.
Fight check: watch for the falling-debris tell, move clear before impact, then attack only when the enemy is in range; use melee for nearby shadows if that matches the current health/ammo state. Success: the boss is defeated, its Memento can be inspected and subsequent Ferry Office Key progression becomes available—not simply surviving one wave. The November 6 Hotfix 3 included other story softlock and save-handling fixes, but is not a new boss attack pattern. Exact in-game combat frames and item coordinates remain uncaptured by GGClue.